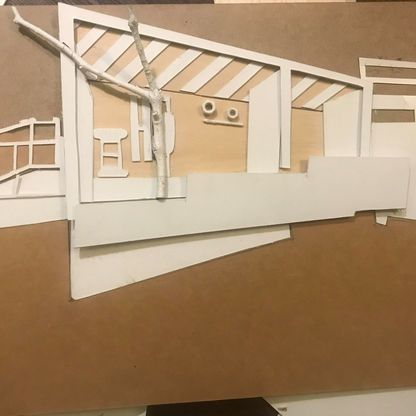
PROJECT 2: WHAT A RELIEF!
PROCESS
This was the 2nd project but was carried out at the end of the semester. This project was to aid us in the final presentation by either making a section, perspective or a tunnel book. Laser cutting was not allowed unless it was the background layer and the main purpose was to improve your worksmanship and neatness and to learn how to express depth in your work. Although I chose sectional perspective at first, I changed it to perspective later as I had trouble in drawing it to scale.

PROCESS OF MAKING

REFLECTION: UNDERSTANDING DEPTH AND DESIGN
The original plan was for this project to be branding, but the plans had changed to create a relief model. This was to help us improve our craftsmanship and to help us understand the depth and space of objects. I was quite nervous when they changed it as I am not the most efficient when it comes to craftsmanship. However, I tried my best to be patient and work slowly but carefully to produce a neat project. I struggled a bit since my first plan and mockup was for sectional perspective, but I changed it to perspective later. This gave me less time to assemble and cut but, in the end, it was worth it as I did a neater job than I expected. My main feedback after the first submission was to use the full 5-inch frame length for the depth and I utilized this for the resubmission. This helped my model look so muck better in 3D and helped me realize how simple it is to add depth but also how impactful such a simple step can be. I think that I can easily use this knowledge in the future semesters as well as in my career.


